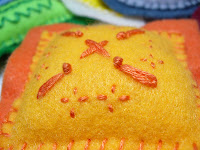
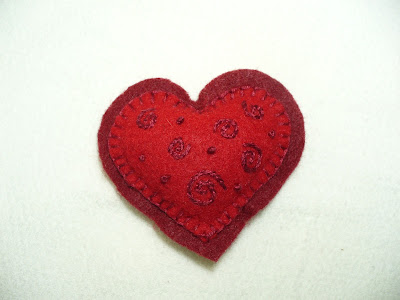
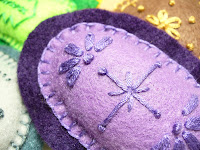
Do you love it too? I'm no expert in embroidery, but one doesn't have to be. It's a very accessible craft, don't you think? Just you, a needle and floss, a quiet evening, and some medium into which to sew. In this case, felt. Because I love felt too. It's also accessible, and it's affordable, colorful, and useful. I love the texturality of it (I think I just made up a word there), and that it doesn't fray when cut. There's no right or wrong side, no bias, no need to iron, and it's easy to stash away in a drawer. Don't be jealous, fabric. I love you too, and you know it. But felt will always have a place in my <3.
So just what is this mess, you're wondering? Well in my mind, these are wonderful teaching tools for Lila, so she can learn her colors and shapes. In Lila's mind, they're squishy little toys for her to spread out, throw around, and give to the dogs to slobber on. Fair enough. I'm actually pretty happy that she plays with them. Notice how she spread them out into an arc? That wasn't me setting them up for a photo shoot, that was all her. Girl likes to have her tools at hand.
Looking closely, you'll see that I used two colors for each toy - a main color, and an accent color for the back and embroidery. I did that to stop myself from making twenty of these things. I have enough felt on hand to make hundreds, and of course I wanted to use as many colors as possible, and I know how my mind works. I needed a limit, and as it is, I barely kept myself down to ten. There's no dark blue in the set after all....
To make these little squishies I first sketched out shapes onto paper. (If I'd thought about it, I could have saved myself some time and gone online to find printable shapes (like this website), which I could then manipulate to the size I wanted using my printer settings). Next I cut out the front piece from one sheet of felt, and used it as a template to cut out another, slightly larger shape, from the alternate color of felt. Felt sort of sticks to itself, so it wasn't hard to do.
Next, I had fun with embroidery, stitching whatever shapes or patterns came to mind. I made sure to leave space all around the edge for the blanket, or buttonhole stitching that you see, which was the next step. Here's a picture of what the back of my completed oval squishy looks like:

You can see the stitching well on this one because I had a hard time finding coordinating floss for that royal purple. After I had only an inch or so left to stitch around the outside of my shape, I grabbed some polyfil and stuffed until it was nice and squishy - not too hard or soft. Goldilocks.
Then I finished off my stitching and secured with a knot. To keep it looking clean, I pushed the needle into the middle of the toy, starting right next to the knot. Holding onto the end of the needle, I ran it through the polyfil, and out the middle of the back side. I tugged a little (the toy gets squished a bit here), cut off the floss right at the felt, and then massaged the back until the floss receded into the toy. The polyfil will hold the floss in place quite nicely that way, the exit hole will never show, and you won't easily notice where you tied off. This may not be the "professional" way to do it, but it's good enough for a felt toy. Reference the above photo for confirmation.
And that's it! Pretty simple, really, and each time I finished another it was its own little reward. The part I enjoyed most was having fun with the patterns in the middle, like the diamond below:
These squishy toys also upped my embroidery skills a notch. I feel pretty good about my french knot these days. If you're looking for some tutorials on different stitches, you'll find plenty online. Here's an excellent one, with tutorials for all the stitches you'll ever need listed along the left side of the blog.
Wondering which is my favorite? You know a mother never chooses from among her children. But it's the moon. I like the embroidery I chose for it, and also I like it because that's Lila's middle name. No, not Embroidery. That would be silly. I mean I love it and all, but c'mon. Moon. Lila Moon.
And can I just say that it was smart of me to finish these before the arrival of baby Lila? I'm not sure I'd have the mental capacity to complete a project like this with a little one on hand. You probably could, but me, no. Though, taken one at a time, this is actually a reasonable project if you're not in a rush. And embroidery is sort of relaxing in a way, isn't it? So if you decide to try this out, let me know - I'd love to hear how it goes for you.


(Is "flower" a shape? Hmmm...)
Best Wishes,
Teresa


I heart these!! They are so vibrant and wonderful - I'm totally inspired to make some for Elise, but I don't know how to do that blanket stitch, so I'll have to learn. They are just great, T!
ReplyDeleteThanks Melissa! And here's the direct link to the blanket stitch tutorial from Stitch School:
Deletehttp://stitchschool.blogspot.com/2009/12/blanket-stitch.html