

Howdy Ho! I'm pleased to present to you the super-adorable and totally free Cutie Patootie Baby Skirt pattern! Oh I do hope you love it as much as I do. It comes in two main versions - pleated and gathered, and you can make yours either with or without pockets. Plus, the pockets can be finished in any creative way you might like! If you make one, please pretty please send me a picture or link so I might see it too! I'd love to see what you come up with.
Okay, so Here's the Link to a two page printable version of the pattern (without pics). Or you can just scroll down and read as you go. If you'd like more information on the fabrics you see or how I came around to making the pattern, check out this blog post. If you're looking for a good starter tutorial on the various many ways you can choose to finish your seams, go to this post from Sew Mama Sew!
Happy Sewing! -Teresa
Cutie Patootie Baby Skirt
Ingredients:
1/4 yard of 45’’ wide fabric
or 1/2 yard of any fabric 44’’ or
less in width
Four 3.5” squares of
coordinating fabric for pockets (optional)
Six inches of 3/4"
elastic (or five and a half inches for the 12-18M skirt)
Matching thread
Fabric marking pen
(washable), chalk, or a graphite pencil (for pleated skirt only)
Basic sewing equipment
Fit:
I’ve sized this pattern
so baby gets the maximum use from your handmade garment. For the most accurate fit, please measure the
child’s waist when possible. The skirt’s
waist measures 18”, and this should fit sizes 18M to 2T or more, depending on baby. For the 12-18M skirt, use 5.5” of elastic
rather than 6 (make sure it will stretch out to 11.5” before using). This will give a final skirt measurement of 17.5".
Skill
Level:
This is an advanced
beginner/intermediate pattern. It
assumes you have a basic knowledge of sewing terms and techniques, and that you’ve
successfully completed several projects in the past. This pattern should take approximately two to
four hours to complete depending on skill level, seam finish chosen, and
whether you include pockets.
Notes: All seams are 1/2" unless
otherwise specified. This pattern uses
three main pieces – the front, back, and bottom. The front and back are combined in step 4 to
become the top, and in the final step the top and bottom are joined to become
the completed skirt.
On to the Instructions!
1.
Cut your fabric pieces. You’ll need two 12’’ x 7’’ pieces, plus either one 45’’ x 5’’ piece or
two 23” x 5” pieces (if your fabric width is less than 45”).

For the pockets (optional), cut four 3.5" squares. Take one of your
four squares and cut into a U shape by pressing in half and, using a cup
or other small round object, trace along one corner of the fabric to make a rounded
shape, then cut. Open, press, and use as
a template for the other three pieces. (You may leave pockets square if desired,
or cut into hearts, etc.).

If
your fabric is less than 45” wide, complete the following step before moving on. With right sides facing, sew your two 23”
pieces together along one of the short sides with a 1/2" seam allowance, and
finish seam as desired. This should make
one 45” wide piece.
 |
| I went with an inside-out flat-felled seam for a clean look - and because it's so easy. You can choose to finish your seams as you wish. |
2.
Press casings.
Take one of your 12”x7” pieces and fold the top (long) side over 1”, press,
fold again and press. Repeat with other 12” x 7” piece.
 |
| There are two folds there, I promise. |
3.
Sew pockets (optional). With right sides facing, sew two of the
pocket pieces together along the “U”, leaving top open. Trim seam to 1/4”, clip curves, turn inside
out, and press. Tuck top inside by 1/2",
press, and topstitch to secure. (Alternately, fold top to outside 1/4", press, fold another 1/4", and topstich a narrow rectangle to get the look you see in the pockets below. Or finish normally, then add lace, ribbon, buttons, etc.) Repeat
for other pocket.


Pin
pockets onto one of your 12” x 7” pieces, centering two inches from each other,
and one inch above the raw (unpressed) edge.
Using a 1/4” seam allowance, topstitch around the “U”, backstitching at
beginning and end to reinforce. This is
now your “front”.

 |
| The completed front piece. Why do my pictures always look so wonky? It's like I live in a funhouse or something.... |
4.
Combine front and back.
On both front and back pieces, open the folds you pressed in, and with right
sides facing, match the front and back together, aligning the creases of the
folds. Sew together along both of the
short sides, creating a tube of fabric.
Finish seams as desired. This is
now your “top”.
 |
| The completed top piece. |
5.
Sew elastic.
Orient the top so that the wrong side of the back is facing you. Take one end of the elastic and place it
between the two casing folds you pressed in earlier, aligning it against the seam to
your left. Pin in place. Stitch along the end of
elastic close to the seam, backstitching at beginning and end.
 |
| Hard to see those casing folds, but they're there. |
Repeat with the other end of elastic, so that
it’s secured just inside the other seam.
Your fabric should be bunched up behind the elastic at this point.

6.
Finish top edge of skirt.
Fold top crease over along entire waist, pulling elastic taut as you
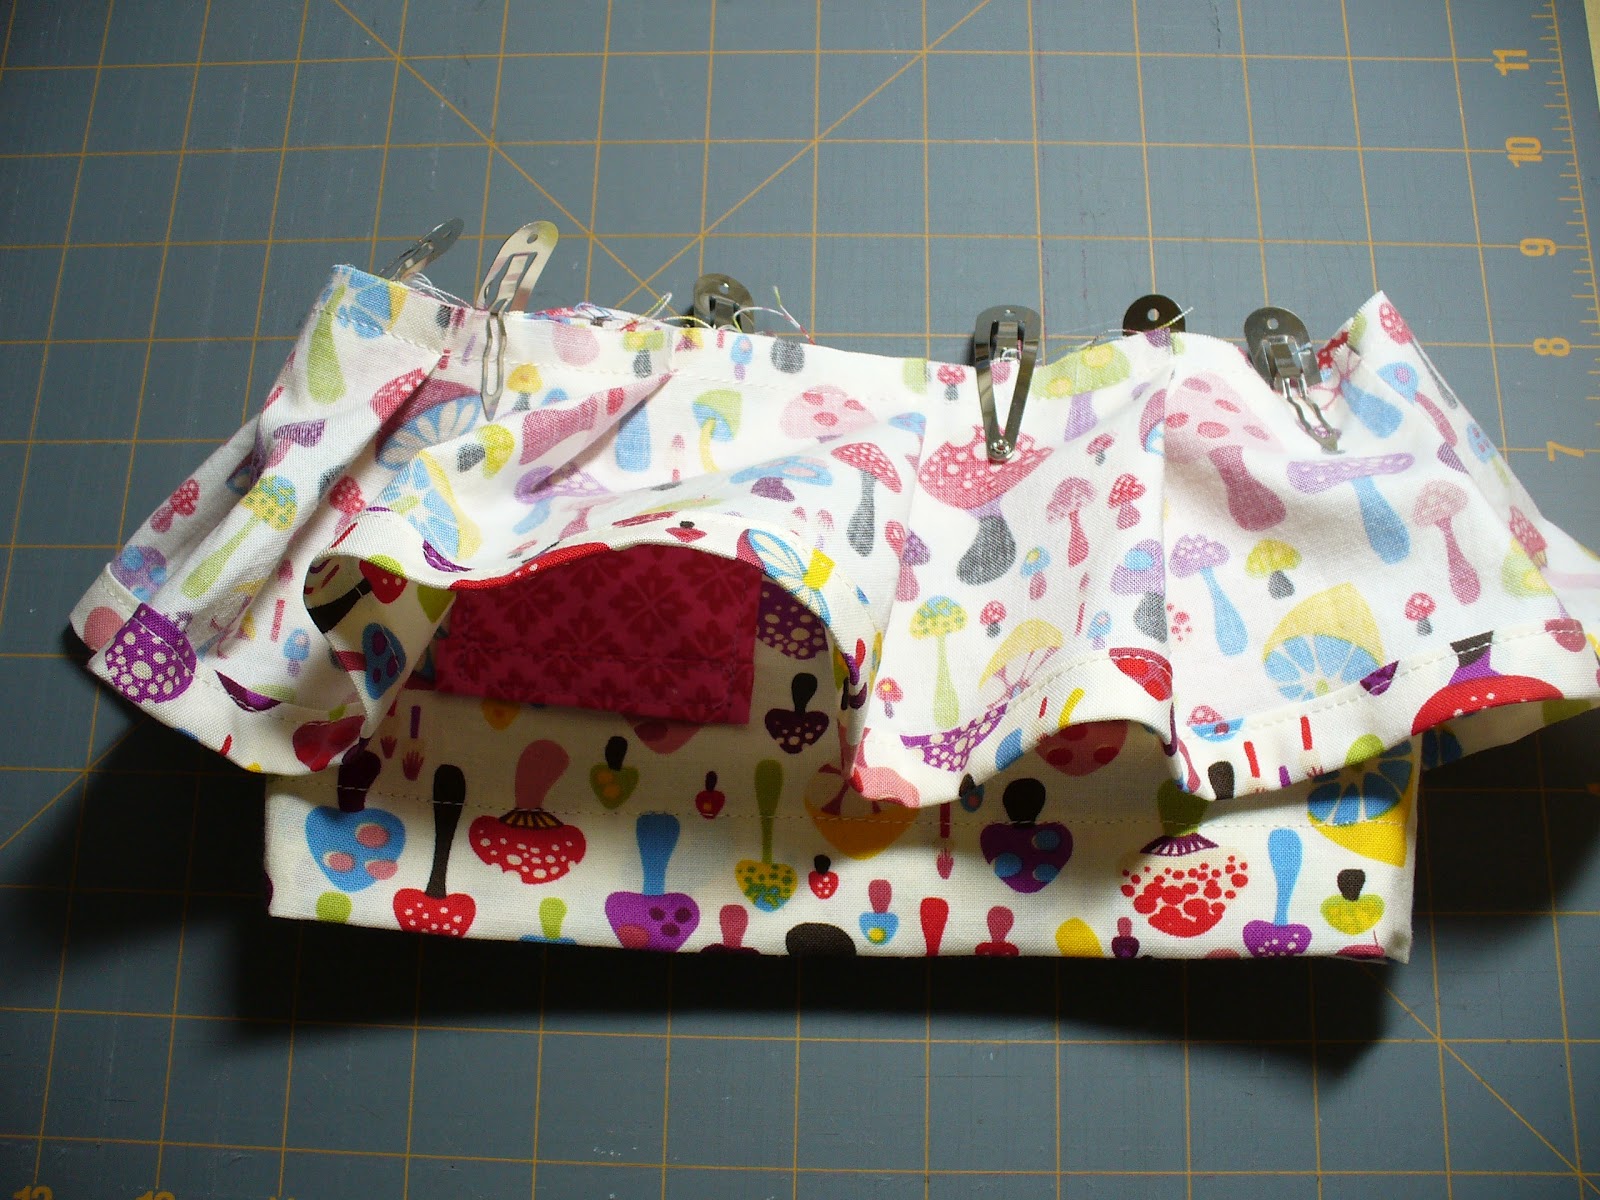
fold (use presser foot to assist in holding one end). Pin elastic in several places.
 |
| If you hate pins, as I do, you can use barrettes for this step. Also, notice I'm using the presser foot to assist me. |
Pull elastic taut and fold again. (Is it just me or does the word "taut" sound naughty?)

Starting first along the elasticized back, sew down the casing 1/8” in from the bottom of the fold, making sure
fabric is smooth and flat as you go. Stretch
the elastic taut (he he) a few inches ahead of your needle (while holding from behind
to secure), adjusting as you go. Try not to sew into the elastic.
 |
| Hold your fabric from behind the presser foot to stabilize as you sew - I wanted to show this in the pic, but I don't have three hands. |
The top of your skirt is now complete.
 |
| All that finagling with elastic means you have a lovely clean seam inside. |
 |
| And a smooth flat front outside. |
 |
| It's hard to see my marks. I added pink squares to guide your eyes. You're welcome. If you're thinking that I just couldn't figure out how to get the pointy finger or cool arrow onto my picture, well, um, you're right. Sigh. |
8.
Make your pleats/gathers.
For pleats: using your marks as a guide, fold your pleats, and secure
with pins. Begin with your second mark;
lift and pull the fabric so that it meets the third mark, tucking the excess
fabric under and to the left, and smoothing flat. Pin to secure. Repeat to the end.

With a 3/8” seam allowance, sew along the top
edge to secure the pleats in place, being sure to keep fabric flat and smooth
as you go.

For
gathers: baste along the top edge of fabric, 1/4" from edge, and leave
several inches of thread hanging from both ends of stitching. Repeat 3/8” from edge. Pull both of the bobbin (bottom) threads
gently to gather fabric, pushing fabric along threads to even out. Leave 1/2” smooth on either end for the seam
allowance. When the gathered length,
including seam allowances, measures 24”, tie off and knot your threads several
times.
This is where a picture should be. I totally dropped the ball, because I didn't think to get a picture of this when I sewed the orange skirt. I'm still a learnin' how to do this tutorial thing. Hopefully the written directions are clear enough. If not, let me know in the comments, and I'll see if I can clear things up.
9.
Finish bottom piece.
Match short ends (sides) of the bottom piece together, right sides
facing, and sew together, creating a tube.
Finish seam as desired.

Take the
raw (unpleated/ungathered) edge of the bottom piece and fold under 1/2”, press,
fold another 1/2" and press again.
Stitch 1/8” inside fold to secure hem.

10. Join top
and bottom. Turn bottom piece inside
out, and place top inside it with right sides facing and raw edges and side
seams aligned. (One tube should now be
inside the other, the one with pleats/gathers on the outside and visible to you).
Sew together, being sure to keep previous
line of stitching inside the seam allowance.
Backstitch to secure.
 |
Finish seam
as desired.

Congratulations - you’ve completed your
Cutie Patootie Baby Skirt! Time to crow/complain
about it in the comments section!


No comments:
Post a Comment